A well-maintained roof is essential for the protection and longevity of your home. Over time, shingles can become damaged or worn out, requiring replacement to maintain the integrity of your roof. Visit our website to know how to and when to replace them.
Inspection and Preparation
The first step in replacing shingles is to conduct a thorough inspection of your roof. This involves carefully assessing the condition of the existing shingles, looking for signs of damage such as cracks, missing pieces, or curling edges. It is important to inspect the entire roof surface to identify any areas that may need attention.
Next, gather the necessary tools and materials for replacing the shingles. These typically include new shingles, roofing nails, a hammer, a pry bar, a utility knife, a ladder, and safety equipment like gloves and goggles.
Removing Old Shingles
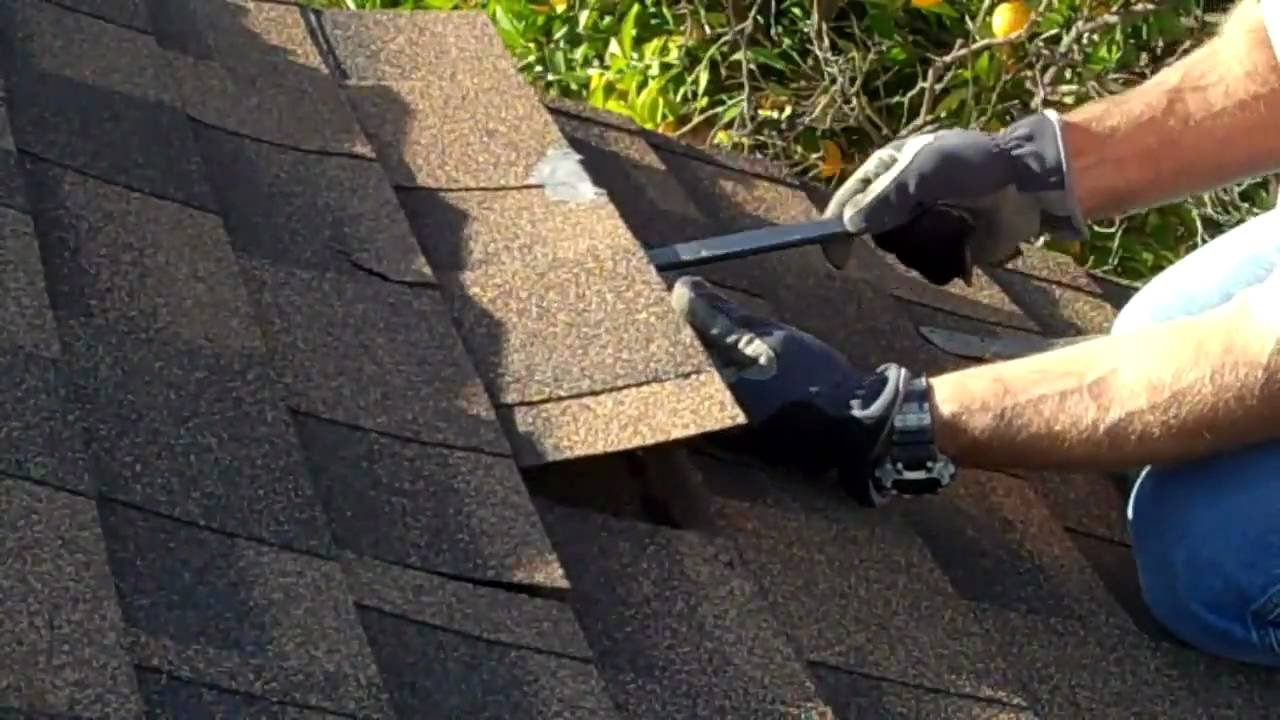
- Before installing new shingles, the old ones must be carefully removed.
- Start at the top of the roof and work your way down, using a pry bar to lift the shingles and a hammer to remove the roofing nails.
- Take caution not to damage the underlying roof structure during this process.
- Once the old shingles have been removed, inspect the exposed roof surface for any signs of damage or deterioration.
- It is crucial to address any issues before proceeding with the installation of new shingles to ensure a solid foundation.
Repairing the Roof Deck
If there are any damaged sections on the roof deck, such as rotten or water-damaged areas, they should be repaired or replaced at this stage. This may involve cutting out the damaged section and installing new plywood or other suitable materials. Ensuring a solid and stable roof deck is essential for the longevity and effectiveness of the new shingles.
Installing New Shingles
Once the roof deck is in good condition, it is time to install the new shingles. Start at the bottom of the roof and work your way up, layering the shingles as you go. Secure each shingle in place using roofing nails, ensuring they are properly aligned and overlapping according to the manufacturer’s instructions.
Carefully cut shingles as needed to fit around vents, chimneys, or other roof features. Use a utility knife to make precise cuts and ensure a neat and professional-looking installation.
Finishing Touches and Cleanup
- After all the new shingles have been installed, it is time for the finishing touches.
- Install new flashing around chimneys, vents, and other vulnerable areas to prevent water infiltration.
- This will help protect your roof from leaks and ensure its longevity.
- Finally, clean up any debris or excess materials from the roof and surrounding areas.
- Thoroughly inspect the newly installed shingles to ensure they are securely fastened and properly aligned.
Regular Maintenance and Inspection
After the shingles on your roof have been repaired or replaced, it is critical to do routine maintenance and inspections in order to forestall other problems. It is important to keep the gutters and downspouts free of dirt and leaves on a regular basis so that water may flow freely. Regular visual checks should be carried out to search for any indications of damage or wear, and any issues should be dealt with as soon as possible.
The periodic replacement of shingles is an essential part of roofing maintenance and repair and must always be included. If you follow the step-by-step process that is outlined in this blog post, you will be able to ensure that the shingles on your roof are replaced correctly and successfully, which will safeguard your property and ensure that your roof lasts for as long as possible. If you do this, you will extend the life of your roof. When undertaking significant or intricate roof repairs, safety should always be your top priority, and if required, you should seek the assistance of roofing professionals.